外观
Swing组件
面板
Swing中,窗体有一个容器,组件要添加到容器中才会显示,每一个面板也是一个容器。
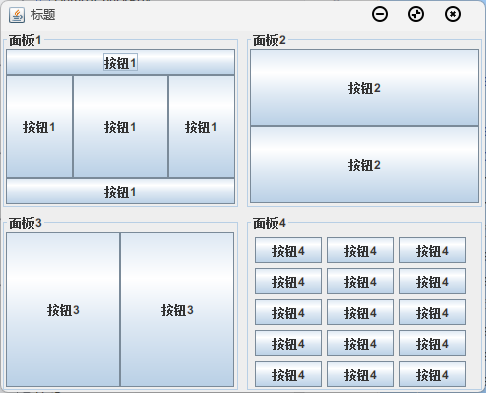
普通面板——JPanel类
JPanel是最常用的面板。它必须在窗体中被使用。它自己就是一个容器,因此它可以包含组件、设置布局方式、设置边框等。它的使用方法和窗体的容器类似。
示例代码:
package swing.Panel;

import javax.swing.*;
import java.awt.*;

public class DemoJPanel extends JFrame {
    private DemoJPanel(){
        super("标题");
        Container container = getContentPane();
        container.setLayout(new GridLayout(2, 2, 5, 5));
        //在JPanel的构造方法中 参数可以带有布局风格 因为面板也算是一种容器
        JPanel jPanel1 = new JPanel();
        jPanel1.setLayout(new BorderLayout());
        //可以像上面一样后使用setLayout()方法
        JPanel jPanel2 = new JPanel(new GridLayout(2, 1));
        JPanel jPanel3 = new JPanel(new GridLayout(1, 2));
        JPanel jPanel4 = new JPanel(new FlowLayout(FlowLayout.LEFT));

        jPanel1.setBorder(BorderFactory.createTitledBorder("面板1"));
        jPanel2.setBorder(BorderFactory.createTitledBorder("面板2"));
        jPanel3.setBorder(BorderFactory.createTitledBorder("面板3"));
        jPanel4.setBorder(BorderFactory.createTitledBorder("面板4"));

        jPanel1.add(new JButton("按钮1"), BorderLayout.WEST);
        jPanel1.add(new JButton("按钮1"), BorderLayout.EAST);
        jPanel1.add(new JButton("按钮1"), BorderLayout.NORTH);
        jPanel1.add(new JButton("按钮1"), BorderLayout.SOUTH);
        jPanel1.add(new JButton("按钮1"), BorderLayout.CENTER);

        jPanel2.add(new JButton("按钮2"));
        jPanel2.add(new JButton("按钮2"));

        jPanel3.add(new JButton("按钮3"));
        jPanel3.add(new JButton("按钮3"));

        for (int i = 0; i < 20; i++) {
            jPanel4.add(new JButton("按钮4"));
        }

        container.add(jPanel1);
        container.add(jPanel2);
        container.add(jPanel3);
        container.add(jPanel4);

        setBounds(100, 100, 500, 400);
        setDefaultCloseOperation(WindowConstants.EXIT_ON_CLOSE);
        setVisible(true);
    }
    public static void main(String[] args) {
        new DemoJPanel();
    }
}
运行结果:
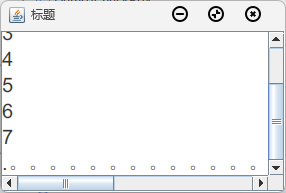
滚动面板——JScrollPane类
滚动面板用于在较小的容器中显示较大的组件,一般用于给文本域、表格加滚动条。
它的使用方法是在实例化时将组件作为参数传入构造方法里,然后向容器中添加滚动面板。
示例代码:
package swing.Panel;

import javax.swing.*;
import java.awt.*;

public class DemoJScrollPanel extends JFrame {
    //本文件演示滚动窗体
    private DemoJScrollPanel() {
        super("标题");
        Container container = getContentPane();
        JTextArea jTextArea = new JTextArea();
        jTextArea.setFont(new Font(null, Font.PLAIN, 20));
        JScrollPane jScrollPane = new JScrollPane(jTextArea);  //构造方法里的参数写要创建滚动面板的组件 不要使用add()方法
        container.add(jScrollPane);
        setBounds(100, 100, 300, 200);
        setDefaultCloseOperation(WindowConstants.EXIT_ON_CLOSE);
        setVisible(true);
    }

    public static void main(String[] args) {
        new DemoJScrollPanel();
    }
}
运行结果如下。当文本域内容过多时,它会在指定方向添加滚动条。
标签——JLabel类
JLabel类用于显示一个标签,此标签可以显示图片、文字,不可被选中和编辑。
JLabel类的常用构造方法如下:
public JLabel():创建一个无图标、无文字的标签。public JLabel(String text):创建一个文字为text的标签。
JLabel的常用方法如下:
public void setText(String text):设置标签的文本。public void setSize(int width, int height):设置标签的大小。public void setLocation(int x, int y):设置标签的位置。public void setBounds(int x, int y, int width, int height):设置标签的大小和位置。public void setVisible(boolean b):设置标签是否可见。public void setFont(Font font):设置标签的字体。public void setForeground(Color fg):设置字体颜色。public void setBackground(Color bg):设置背景颜色。
示例代码:
package swing.Label;

import javax.swing.*;
import java.awt.*;
import java.net.URL;
import java.util.Objects;

public class DemoJLabel extends JFrame {
    //标签 JLabel
    private DemoJLabel() {
        super("标题");
        Container container = getContentPane();
        container.setLayout(new FlowLayout(FlowLayout.CENTER));  //若容器设为绝对布局 则组件要同时设置大小和位置
        //图标Icon类 构造方法内可选参数分别是
        URL url = DemoJLabel.class.getResource("Java.jpeg");   //URL类 存储文件的路径
        System.out.println("该图片的路径为:" + url);
        Icon icon = new ImageIcon(Objects.requireNonNull(url));   //图标对象 存储图标
        //也可使用字符串 内是它的地址
        JLabel jLabel1 = new JLabel("这是一个JLabel标签", SwingConstants.CENTER);
        //还可以设置标签的颜色 字体
        Font font = new Font("宋体", Font.BOLD, 15);
        jLabel1.setFont(font);
        jLabel1.setForeground(Color.GREEN);
        JLabel jLabel2 = new JLabel(icon);
        container.add(jLabel1);
        container.add(jLabel2);
        setBounds(100, 100, 500, 350);
        setDefaultCloseOperation(WindowConstants.EXIT_ON_CLOSE);
        setVisible(true);
    }

    public static void main(String[] args) {
        new DemoJLabel();
    }
}
运行结果如下:

按钮组件
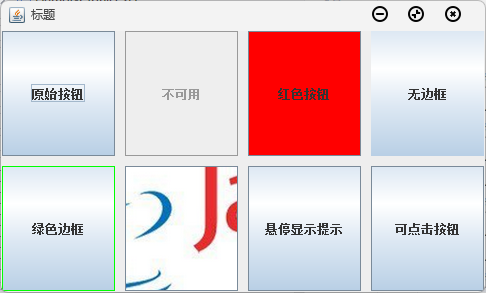
普通按钮——JButton类
它类似于HTML中的按钮,点击可以触发事件。
JButton类的构造方法如下:
public JButton():创建一个无文字的按钮。public JButton(String text):创建一个带有文字信息的按钮。public JButton(Icon icon):创建一个带图标的按钮。public JButton(String text, Icon icon):创建一个带文字和图标的按钮。
JButton类的成员方法如下:
setIcon(Icon defaultIcon):设置按钮图标。setToolTipText(String text):为按钮设置提示文字。setBorderPainted(boolean b):设置是否绘制按钮边框,b若为true则绘制。setEnable(boolean b):设置按钮是否可用。setFocusPainted(boolean b):设置是否显示按钮焦点框。
示例代码:
package swing.Button;

import javax.swing.*;
import java.awt.*;

public class DemoJButton extends JFrame {
    //本文件演示如何使用按钮 基本操作包括给按钮添加边框 设置颜色 设置是否可用 设置悬停提示 以及点击后发生事件
    private DemoJButton() {
        super("标题");
        setBounds(100, 100, 500, 300);
        setDefaultCloseOperation(WindowConstants.EXIT_ON_CLOSE);
        setVisible(true);
        Container container = getContentPane();
        container.setLayout(new GridLayout(2, 4, 10, 10));
        JButton[] jButtons = new JButton[8];
        for (int i = 0; i < jButtons.length; i++) {
            jButtons[i] = new JButton();
            container.add(jButtons[i]);
        }
        //按钮1设置为原始按钮 方便对比
        jButtons[0].setText("原始按钮");
        //按钮2设置为不可用
        jButtons[1].setText("不可用");
        jButtons[1].setEnabled(false);  //setEnabled()方法设置按钮是否可用 实际上所有组件都可以使用这个方法
        //按钮3设置背景颜色为红色
        jButtons[2].setText("红色按钮");
        jButtons[2].setBackground(Color.RED);  //setBackground()方法设置背景颜色
        //按钮4设置为无边框
        jButtons[3].setText("无边框");
        jButtons[3].setBorderPainted(false);  //setBorderPainted()方法设置按钮是否有边框
        //按钮5设置为绿色边框
        jButtons[4].setText("绿色边框");
        jButtons[4].setBorder(BorderFactory.createLineBorder(Color.GREEN));  //setBorder()方法设置按钮的边框
        //按钮6设置为图片按钮
        Icon icon = new ImageIcon("src/swing/Button/Java.jpeg");  //可以使用向上转型创建 也可以使用ImageIcon的getIcon()方法
        jButtons[5].setText("图片按钮");
        jButtons[5].setIcon(icon);  //setIcon()设置图片的图标 参数是一个Icon对象
        //按钮7设为悬停显示提示
        jButtons[6].setText("悬停显示提示");
        jButtons[6].setToolTipText("提示");  //setToolTipText()方法设置悬停提示
        //按钮8设为可点击
        jButtons[7].setText("可点击按钮");
        jButtons[7].addActionListener(e -> JOptionPane.showConfirmDialog(this, "这是一个对话框"));
        setBounds(100, 100, 500, 300);
        setDefaultCloseOperation(WindowConstants.EXIT_ON_CLOSE);
        setVisible(true);
    }

    public static void main(String[] args) {
        new DemoJButton();
    }
}
运行结果:
单选按钮——JRadioButton类
单选按钮使用JRadioButton表示,它的构造方法如下所示:
public JRadioButton():创建一个无图标无文本的单选按钮。public JRadioButton(Icon icon):创建一个带有图标的单选按钮。public JRadioButton(String text):创建一个带有文本的单选按钮。public JRadioButton(String text, Icon icon):创建一个带有文本、带有图标的单选按钮。public JRadioButton(String text, Icon icon, boolean selected):创建一个带有文本、带有图标、设置选中状态的按钮。
为了实现单选按钮的排斥功能,一般需要将这些按钮放到一个按钮组中。按钮组使用ButtonGroup表示,在实例化后,将需要相互排斥的按钮使用add()方法加到按钮组中即可。
示例1:
package swing.Button;

import javax.swing.*;
import java.awt.*;

public class DemoJRadioButton extends JFrame {
    private DemoJRadioButton() {
        //本文件演示怎么使用单选按钮
        //运行此代码块时请注释掉下面的代码块 这个代码块仅演示单选按钮如何使用
        super("标题");
        setBounds(200, 200, 300, 200);
        setDefaultCloseOperation(WindowConstants.EXIT_ON_CLOSE);
        setVisible(true);
        Container container = getContentPane();
        container.setLayout(new GridLayout(2, 1));
        JRadioButton jRadioButton = new JRadioButton("单选按钮");
        container.add(jRadioButton);
        JButton jButton = new JButton("检测");
        JPanel jPanel = new JPanel();
        jPanel.add(jButton);
        jButton.setSize(40,21);
        container.add(jPanel);
        jButton.addActionListener(e -> {
            System.out.println("\"单选按钮\"有没有被选中?" + jRadioButton.isSelected());   //isSelected()方法可以返回该按钮是否被选中的布尔值
        });
    }

    public static void main(String[] args) {
        new DemoJRadioButton();
    }
}
运行结果:
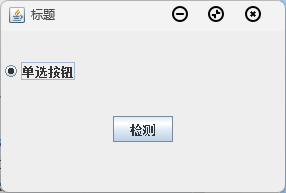
点击检测按钮后会输出单选按钮的选中状态。
示例2:
package swing.Button;

import javax.swing.*;
import java.awt.*;

public class DemoJRadioButton extends JFrame {
    private DemoJRadioButton() {
        //下面演示怎么设置一个按钮若选中就取消另一个按钮的选择 实现方法是将两个按钮添加到一个按钮组中
        super("标题");
        Container container = getContentPane();
        container.setLayout(new GridLayout(1, 2));
        JRadioButton jRadioButton1 = new JRadioButton("选项1");
        JRadioButton jRadioButton2 = new JRadioButton("选项2");
        ButtonGroup buttonGroup = new ButtonGroup();   //定义按钮组
        buttonGroup.add(jRadioButton1);
        buttonGroup.add(jRadioButton2);  //添加两个按钮 这样两个按钮就进入这个按钮组了 就会成为单选按钮
        jRadioButton1.setSelected(true);  //这个方法可以设置该按钮是否默认被选中
        container.add(jRadioButton1);
        container.add(jRadioButton2);
        setBounds(200, 200, 300, 200);
        setDefaultCloseOperation(WindowConstants.EXIT_ON_CLOSE);
        setVisible(true);
        //若想清除按钮的选择状态 可以调用按钮组对象的clearSelection()方法
    }

    public static void main(String[] args) {
        new DemoJRadioButton();
    }
}
运行结果:
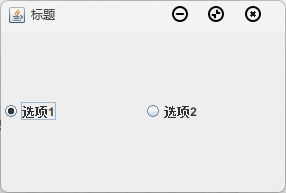
这两个按钮相互排斥,在选中选项2后选项1会取消勾选。
复选框——JCheckBox类
复选框使用JCheckBox表示,它有两个选中方式:选中和未选中,有的复选框会有半选中方式。JCheckBox类的构造方法如下:
public JCheckBox():创建一个没有文本没有图标的复选框。public JCheckBox(String text):创建一个文本为text的复选框。public JCheckBox(String text, Icon icon):创建一个有文本有图标的复选框。
示例代码:
package swing.Button;

import javax.swing.*;
import java.awt.*;

public class DemoJCheckBox extends JFrame{
    //该文件演示如何使用复选框
    private DemoJCheckBox(){
        super("标题");
        setBounds(100, 100, 500, 300);
        setDefaultCloseOperation(WindowConstants.EXIT_ON_CLOSE);
        setVisible(true);
        JCheckBox jCheckBox1 = new JCheckBox("按钮1");
        jCheckBox1.setSelected(true);   //该方法会设置复选框的默认选中状态
        JCheckBox jCheckBox2 = new JCheckBox("按钮2");
        JCheckBox jCheckBox3 = new JCheckBox("按钮3");
        Container container = getContentPane();
        container.setLayout(new FlowLayout());
        container.add(jCheckBox1);
        container.add(jCheckBox2);
        container.add(jCheckBox3);
        JButton jButton = new JButton("打印");
        jButton.addActionListener(e -> {
            System.out.println(jCheckBox1.getText() + "按钮的选中状态" + jCheckBox1.isSelected());  //isSelected()方法返回复选框是否选中的布尔值
            System.out.println(jCheckBox2.getText() + "按钮的选中状态" + jCheckBox2.isSelected());
            System.out.println(jCheckBox3.getText() + "按钮的选中状态" + jCheckBox3.isSelected());
        });
        container.add(jButton);
    }
    public static void main(String[] args) {
        new DemoJCheckBox();
    }
}
运行结果:
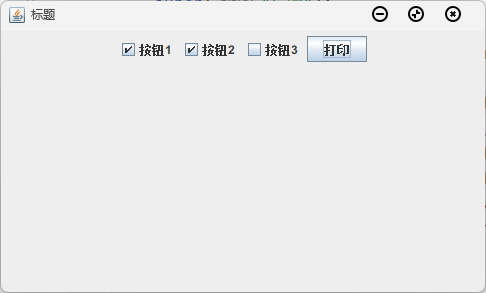
当点击按钮时,三个复选框的选中状态会输出到控制台。
列表组件
下拉列表框——JComboBox类
下拉列表框默认显示一个选项,当点击后显示全部选项,并可以选择一个选项。它可以节省空间而显示多数的选择,是一个比较常用的控件。 下拉列表框用JComboBox表示,它的构造方法如下:
public JComboBox(ComboBoxModel dataModel):创建一个基于下拉列表框模型的对象。下拉列表框的数据使用模型中的数据。public JComboBox(Object[] arrayData):创建一个基于数组数据的下拉列表框对象。public JComboBox(Vector vector):创建一个基于向量的下拉列表框对象。
JComboBox类的常用方法如下:
addItem(Object anObject):添加一个选项。getItemCount():获取选项个数。getSelectedItem():获取被选中的选项。getSelectedIndex():获取被选中的选项的索引。setEditable(boolean aFlag):设定下拉列表框的选项是否可被编辑。
下面给出三种添加选项的例子:
//使用addItem()方法
JComboBox<String> jComboBox = new JComboBox<>();
jComboBox.addItem("身份证");
jComboBox.addItem("学生证");
jComboBox.addItem("军人证");
container.add(jComboBox);
jComboBox.setBounds(20, 10, 80, 21);
JButton jButton = new JButton("打印");
jButton.setBounds(140,10,60,21);
container.add(jButton);
jButton.addActionListener(e -> System.out.println("选中的项是:" + jComboBox.getSelectedItem() + " 索引值为 " + jComboBox.getSelectedIndex()));
//将对象数组作为参数传入
String[] items = {"身份证", "学生证", "军人证"};
container.add(jComboBox);
jComboBox.setBounds(20, 10, 80, 21);
JButton jButton = new JButton("打印");
jButton.setBounds(140, 10, 60, 21);
container.add(jButton);
jButton.addActionListener(e -> System.out.println("选中的项是:" + jComboBox.getSelectedItem() + " 索引值为 " + jComboBox.getSelectedIndex()));//使用下拉列表模型
String[] items = {"身份证", "学生证", "军人证"};
ComboBoxModel<String> comboBoxModel = new DefaultComboBoxModel<>(items);
JComboBox<String> jComboBox = new JComboBox<>(comboBoxModel);
//也可以这样使用 jComboBox.setModel(comboBoxModel); 但是这两个用法都不是很常见
jComboBox.setBounds(20, 10, 80, 21);
container.add(jComboBox);
JButton jButton = new JButton("打印");
jButton.setBounds(140, 10, 60, 21);
container.add(jButton);
jButton.addActionListener(e -> System.out.println("选中的项是:" + jComboBox.getSelectedItem() + " 索引值为 " + jComboBox.getSelectedIndex()));示例代码:
package swing.ListBox;

import javax.swing.*;
import java.awt.*;

public class DemoJComboBox extends JFrame{
    //本文件演示如何使用下拉列表框
    private DemoJComboBox(){
        super("标题");
        Container container = getContentPane();
        container.setLayout(null);

        //下面演示JComboBox的常用方法 addItem()添加组件 getSelectedItem()获取被选中的组件 getSelectedIndex()获取被选中元素的索引值 removeItem()移除项
        JComboBox<String> jComboBox = new JComboBox<>();
        jComboBox.addItem("身份证");
        jComboBox.addItem("学生证");
        jComboBox.addItem("军人证");
        jComboBox.setEditable(true);  //setEditable()方法设置组件是否可编辑 这里设为可编辑
        jComboBox.setSelectedIndex(1);  //setSelectedIndex()设置默认被选中的标签 还有setSelectedItem()
        container.add(jComboBox);
        jComboBox.setBounds(20, 10, 80, 21);
        JButton jButton = new JButton("打印");
        jButton.setBounds(140,10,60,21);
        container.add(jButton);
        jButton.addActionListener(e -> System.out.println("选中的项是:" + jComboBox.getSelectedItem() + " 索引值为 " + jComboBox.getSelectedIndex()));

        setBounds(100, 100, 300, 150);
        setDefaultCloseOperation(WindowConstants.EXIT_ON_CLOSE);
        setVisible(true);
    }
    public static void main(String[] args) {
        new DemoJComboBox();
    }
}
运行结果:
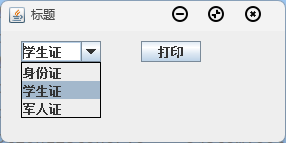
当点击打印按钮后,下拉列表的选中值会输出到控制台。
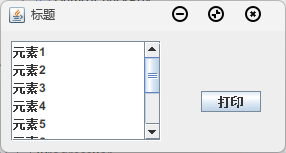
列表框——JList类
JList用于创建一个不具有下拉效果的列表,相当于单列的表格。在开始需要指定列表框的长和宽,还需要添加滚动面板,否则选项会溢出。
JList类的常用构造方法如下:
public JList():创建一个没有选项的下拉列表。public JList(ListModel\<E\> dataModel):基于列表模型创建列表。public JList(final Vector\<? extends E\> listData):基于向量创建列表。public JList(Object[] listData):基于对象数组创建列表。
下面给出几种创建列表框的方法:
//第一种使用构造方法
String[] elements = {"元素1", "元素2", "元素3", "元素4", "元素5", "元素6", "元素7", "元素8", "元素9", "元素10"};
JList<String> jList = new JList<>(elements);
//第二种使用addElement()方法
DefaultListModel<String> listModel = new DefaultListModel<>();
for (String tmp : elements) listModel.addElement(tmp);
JList<String> jList = new JList<>(listModel);可以使用下方的代码设置选中方式:
//可以选择通过setSelectionMode()方法设置选择模式
ListSelectionModel.SINGLE_INTERVAL_SELECTION 单选
ListSelectionModel.MULTIPLE_INTERVAL_SELECTION 多选 默认
ListSelectionModel.SINGLE_INTERVAL_SELECTION 邻选
jList.setSelectionMode(ListSelectionModel.SINGLE_INTERVAL_SELECTION);
示例代码:
package swing.ListBox;

import javax.swing.*;
import java.awt.*;
import java.util.List;

public class DemoJList extends JFrame {
    //本文件演示如何使用列表框
    private DemoJList() {
        super("标题");
        Container container = getContentPane();
        container.setLayout(null);

        //因为元素过多而面板过小会造成显示不全 因此最好添加滚动面板
        JScrollPane jScrollPane = new JScrollPane(jList);
        jScrollPane.setBounds(10, 10, 150, 100);
        container.add(jScrollPane);
        JButton jButton = new JButton("打印");
        jButton.setBounds(200, 60, 60, 21);
        jButton.addActionListener(e -> {
            List<String> list = jList.getSelectedValuesList();
            list.forEach(i -> System.out.print(i + " "));
            System.out.println();
            System.out.println("------------------------");
        });
        container.add(jButton);

        setBounds(100, 100, 300, 160);
        setDefaultCloseOperation(WindowConstants.EXIT_ON_CLOSE);
        setVisible(true);

    }

    public static void main(String[] args) {
        new DemoJList();
    }
}
运行结果:
文本组件
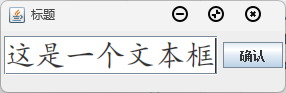
文本框——JTextField类
JTextArea类用于显示文本框,用户可以在文本框中输入内容。
JTextArea类的常用构造方法如下:
public JTextField():创建一个无默认文本、列宽为0的文本框。public JTextField(String text):创建一个默认文本为text的文本框。public JTextField(int columns):创建一个默认列宽为columns的文本框。public JTextField(String text, int columns):创建一个默认文本为text,列宽为columns的文本框。
JTextArea类的常用方法如下:
public void setText(String text):设置文本框的文本。public String getText():获取文本框内的文本。public void setSize(int width, int height):设置文本框的大小。public void setLocation(int x, int y):设置文本框的位置。public void setBounds(int x, int y, int width, int height):设置文本框的大小和位置。public void setVisible(boolean b):设置文本框是否可见。public void setFont(Font font):设置文本框的字体。public void setForeground(Color fg):设置字体颜色。public void setBackground(Color bg):设置背景颜色。
示例代码:
package swing.TextBox;

import javax.swing.*;
import java.awt.*;

public class DemoJTextField {
    public static void main(String[] args) {
        //本文件演示如何使用文本域
        JFrame jFrame = new JFrame("标题");
        Container container = jFrame.getContentPane();
        container.setLayout(new FlowLayout());

        //这里不演示构造方法了 仅介绍可选的参数
        //String text 指定文本初始显示内容
        //int columns 指定文本框显示的列宽
        JTextField jTextField = new JTextField("这是一个文本框");  //指定文本框初始显示内容
        container.add(jTextField);
        JButton jButton = new JButton("确认");
        jTextField.setFont(new Font("楷体", Font.PLAIN, 30));   //设定字体
        jButton.addActionListener(e -> {
            System.out.println("文本框内的内容是:" + jTextField.getText());    //getText()方法返回文本内容
            jTextField.setText("");  //设置内容 这里选择清空
            jTextField.requestFocus();   //设置焦点
        });
        container.add(jButton);
//        jTextField.setColumns(30); //设定列宽
        //也可以为文本框添加事件 默认是回车
        jTextField.addActionListener(e -> System.out.println("点击了回车 此时文本框的内容是:" + jTextField.getText()));
        jFrame.setBounds(100, 100, 300, 100);
        jFrame.setDefaultCloseOperation(WindowConstants.EXIT_ON_CLOSE);
        jFrame.setVisible(true);
    }
}
运行结果:
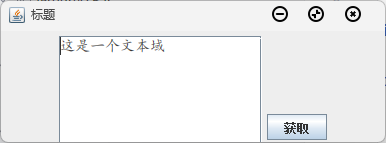
文本域——JTextArea类
文本域相对于文本框在于它有多行,可以包含大量文本。文本域使用JTextArea表示,它的构造方法如下:
public JTextField():创建一个无文本的文本域。public JTextField(String text):创建一个包含默认文本的文本域。public JTextField(String text, int columns):创建一个包含默认文本、指定列宽的文本域。public JTextField(Document doc, String text, int columns):创建一个具有文档模型、包含默认文本、指定列宽的文本域。
它的常用方法如下:
setLineWrap(boolean wrap):设置文本域的文本内容是否自动换行。append(String str):向文本域中添加文本内容。
示例代码:
package swing.TextBox;

import javax.swing.*;
import java.awt.*;

public class DemoJTextArea {
    //本文件演示如何使用文本域
    public static void main(String[] args) {
        JFrame jFrame = new JFrame("标题");
        Container container = jFrame.getContentPane();
        container.setLayout(new FlowLayout());

        //下面演示如何使用文本域 构造方法仍然有可选参数 text rows和columns 分别代表默认显示内容 显示行数和显示列宽
        JTextArea jTextArea = new JTextArea(10, 25);  //这里选择显示10行20列
        jTextArea.setText("这是一个文本域");  //setText()方法可以设置文本域的内容
        jTextArea.setFont(new Font("楷体", Font.PLAIN, 15));  //setFont()方法可设置字体
        //jTextArea.setRows();  jTextArea.setColumns();  可设置行和高
        //jTextArea.append();  可追加字符串
        //jTextArea.insert();  可插入字符串
        //jTextArea.setLineWrap();   设置是否换行
        //因可能文字的显示范围超出了窗口的显示范围 这里添加滚动面板
        JScrollPane jScrollPane = new JScrollPane(jTextArea);
        JButton jButton = new JButton("获取");
        jButton.addActionListener(e -> {
            System.out.println("文本内容是:");
            System.out.println(jTextArea.getText());  //getText()方法可以获取文本内容
        });
        container.add(jScrollPane);
        container.add(jButton);
        jFrame.setBounds(100, 100, 400, 150);
        jFrame.setDefaultCloseOperation(WindowConstants.EXIT_ON_CLOSE);
        jFrame.setVisible(true);
    }
}
表格组件
创建表格——JTable类
表格使用JTable表示。它的构造方法如下:
public JTable(Object[][] rowData, final Object[] columnNames):rowData表示存储表格数据的二维数组,columnName代表每一列的名字。
为防止表格溢出,也需要将表格添加到滚动面板中。
示例代码:
package swing.TableBox;

import javax.swing.*;
import java.awt.*;

public class DemoJTable extends JFrame {
    //本文件演示如何使用表格文件
    private DemoJTable() {
        super("标题");
        Container container = getContentPane();
        container.setLayout(new BorderLayout());   //设为边界布局

        //表格的构造方法有几个参数 Object[][] rowData,Object columnNames  分别代表数据和表头 所以下方会创建数据
        String[][] data = new String[20][7];
        String[] columns = {"A", "B", "C", "D", "E", "F", "G"};
        for (int i = 0; i < data.length; i++) {
            for (int j = 0; j < data[i].length; j++) {
                data[i][j] = columns[j] + i;
            }
        }
        JTable jTable = new JTable(data, columns);
        jTable.setSelectionBackground(Color.GREEN);   //setSelectionBackground()方法可以设置被选中数据的背景色
        jTable.setSelectionForeground(Color.ORANGE);  //setSelectionForeground()方法可以设置被选中数据的前景色 即字体颜色
        jTable.setFont(new Font("黑体", Font.PLAIN, 20));   //setFont()方法可以设置表格字体 颜色 风格
        jTable.setRowHeight(30);  //setRowHeight()方法可以设置行宽
        jTable.setSelectionMode(ListSelectionModel.MULTIPLE_INTERVAL_SELECTION);  //setSelectionMode()方法可以设置选择模式 这里选择可多选
        jTable.setCellSelectionEnabled(true);
        //JTable要配合滚动条使用
        JScrollPane jScrollPane = new JScrollPane(jTable);
        container.add(jScrollPane);
        JButton jButton = new JButton("检测");
        jButton.addActionListener(e -> {
            //获取表格数据
            System.out.println("表格共有" + jTable.getRowCount() + "行" + jTable.getColumnCount() + "列");
            //getRowCount() getColumnCount()方法可以获取行列数
            System.out.println("表格的第2列名称为:" + jTable.getColumnName(1));
            //getColumnName()方法可以获取列名称
            System.out.println("表格的第2行第2列名称是:" + jTable.getValueAt(1, 1));
            //getValueAt()方法可以获取具体位置的值 需注意这个参数和上面方法的参数都是索引值
            System.out.println("第二行第二列元素是否被选中? " + jTable.isCellSelected(1, 1));
        });
        container.add(jButton, BorderLayout.SOUTH);
        setBounds(100, 100, 400, 400);
        setDefaultCloseOperation(WindowConstants.EXIT_ON_CLOSE);
        setVisible(true);
    }

    public static void main(String[] args) {
        new DemoJTable();
    }
}
运行结果:

当选中第二行第二列后,控制台会输出相关信息。
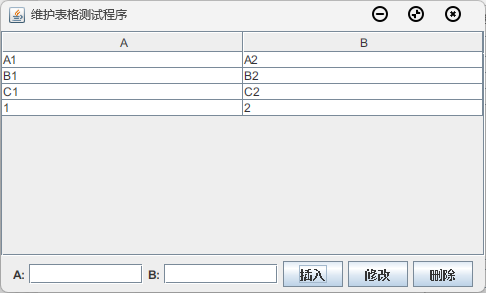
维护表格——DefaultTableModel类
Java中维护表格的表格模型类有很多,DefaultTableModel是最常用的一个类。它的构造方法如下:
public DefaultTableModel():创建一个无初始数据的表格模型。public DefaultTableModel(int rowCount, int columnCount):创建一个设定初始列数和行数的表格模型。public DefaultTableModel(Object[] columnNames, int rowCount):创建一个具有列名称和指定行数的表格模型。public DefaultTableModel(Object\[]\[] data, Object[] columnNames):创建一个已经初始化数据的表格模型。
表格模型被创建后,使用JTable类的构造方法JTable(TableModel dm)就可以创建表格了。处理表格数据时,使用getValueAt()就可以获取单元格数据,使用setValueAt()可以设置单元格数据。
示例代码:
package swing.TableBox;

import javax.swing.*;
import javax.swing.table.DefaultTableModel;
import javax.swing.table.TableRowSorter;
import java.awt.*;

public class DemoJTableModel {
    //本文件演示如何维护表格模型 这里使用到了一个类 叫TableModel 它是个接口 它的实现类是AbstractTableModel 它是抽象类 所以用子类DefaultTableModel实例化
    //同时本文件也演示如何正确地创建程序
    public static void main(String[] args) {
        new MyJFrame();   //主文件只创建一个对象即可 其他的操作都在其他方法里实现
    }

    private static class MyJFrame extends JFrame {
        MyJFrame() {
            //该构造方法演示了如何创建表格程序
            super("维护表格测试程序");  //因为该类继承自JFrame类 因此调用父类构造方法 作用是设置标题
            setBounds(400, 300, 500, 300); //该句设置宽高和位置
            setMinimumSize(new Dimension(500, 300));  //该语句设置窗口的最小大小 防止窗口过小造成组件挤压引发错误显示
            getContentPane().setLayout(new BorderLayout());  //该句设置布局模式为边界布局
            String[][] data = {{"A1", "A2"}, {"B1", "B2"}, {"C1", "C2"}}; //数据
            String[] columns = {"A", "B"}; //列名
            DefaultTableModel tableModel = new DefaultTableModel(data, columns); //参数指定默认行数和列数为3行2列
            JTable jTable = new JTable(tableModel); //使用上方的DefaultTableModel对象初始化 因为对表格的单元格操作都是靠模型对象实现的
            jTable.setSelectionMode(ListSelectionModel.SINGLE_SELECTION); //设定表格选中模式为单选
            jTable.setRowSorter(new TableRowSorter<>(tableModel)); //setRowSorter()方法可以设置排序方式
            JScrollPane jScrollPane = new JScrollPane(jTable); //为表格创建滚动面板 防止表格显示不全
            getContentPane().add(jScrollPane, BorderLayout.CENTER);  //添加滚动面板
            JPanel jPanel = new JPanel();  //新建一个面板 面板将要添加文本框和按钮
            getContentPane().add(jPanel, BorderLayout.SOUTH);  //将面板放到下方
            JLabel jLabel1 = new JLabel("A:");  //提示信息1
            JLabel jLabel2 = new JLabel("B:");  //提示信息2
            JTextField jTextField1 = new JTextField(10);  //文本框A 存储表格左边待填数据 10代表显示的字符数
            JTextField jTextField2 = new JTextField(10);  //文本框B 存储表格右边待填数据
            JButton jButton1 = new JButton("插入");  //插入按钮
            jButton1.addActionListener(e -> {
                String[] string = {jTextField1.getText(), jTextField2.getText()};  //字符串数组获取文本框内容 作为表格添加行的参数
                tableModel.addRow(string);  //添加行
                jTextField1.setText("");  //清空文本框
                jTextField2.setText("");
                JOptionPane.showMessageDialog(this, "插入成功!", "提示", JOptionPane.INFORMATION_MESSAGE);
                //生成提示对话框
            });
            jButton1.setSize(30, 21);  //设置按钮大小
            JButton jButton2 = new JButton("修改");  //修改按钮
            jButton2.addActionListener(e -> {
                int rowSelected = jTable.getSelectedRow();  //获取选中的列 如此数值为-1则代表没有选中行
                if (rowSelected != -1) {  //若选中行
                    String stringA = jTextField1.getText();  //两个字符串对象分别获取文本框内容
                    String stringB = jTextField2.getText();
                    jTable.setValueAt(stringA, rowSelected, 0);  //实现修改操作
                    jTable.setValueAt(stringB, rowSelected, 1);
                    jTextField1.setText("");  //清空文本框
                    jTextField2.setText("");
                    JOptionPane.showMessageDialog(this, "修改成功!", "提示", JOptionPane.INFORMATION_MESSAGE);
                    //生成提示对话框
                } else {
                    JOptionPane.showMessageDialog(this, "修改失败,请先选中行!", "提示", JOptionPane.ERROR_MESSAGE);
                    //若错误则弹出错误提示
                }
            });
            jButton2.setSize(30, 21);
            JButton jButton3 = new JButton("删除");  //删除按钮
            jButton3.addActionListener(e -> {
                int rowSelected = jTable.getSelectedRow();
                if (rowSelected != -1) {
                    tableModel.removeRow(rowSelected);
                    JOptionPane.showMessageDialog(this, "删除成功!", "提示", JOptionPane.INFORMATION_MESSAGE);
                } else {
                    JOptionPane.showMessageDialog(this, "删除失败,请先选中行!", "提示", JOptionPane.ERROR_MESSAGE);
                }
            });
            jButton3.setSize(30, 21);
            jPanel.add(jLabel1);  //添加组件
            jPanel.add(jTextField1);
            jPanel.add(jLabel2);
            jPanel.add(jTextField2);
            jPanel.add(jButton1);
            jPanel.add(jButton2);
            jPanel.add(jButton3);
            setDefaultCloseOperation(WindowConstants.EXIT_ON_CLOSE);
            setVisible(true);  //设置此窗体可见
        }
    }
}
运行结果:
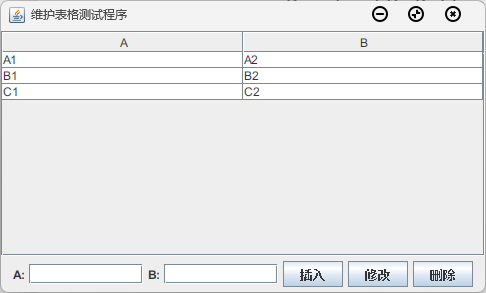
在A和B中输入信息后点击插入,会在表格中添加新行: