
外观
PyQt6 的绘制
PyQt6绘画系统能够呈现矢量图形、图像和基于字体的文本轮廓。想要更改或增强现有的小部件,或者从头创建自定义小部件时,需要 PyQt6 工具包提供的绘图 API 进行绘制。
QPainter
QPainter 在小部件和其他可绘制单元上执行底层绘制。从简单的线条到复杂的形状,它可以画任何东西。
paintEvent 方法
绘制时由 paintEvent 方法完成的。绘制代码位于 QPainter 对象的开始和结束方法之间。它在小部件和其他绘制单元上执行底层绘制。
PyQt6 绘制文本
从绘制一些 Unicode 文本开始。
import sys
from PyQt6.QtWidgets import QWidget, QApplication
from PyQt6.QtGui import QPainter, QColor, QFont
from PyQt6.QtCore import Qt

class Example(QWidget):
    def __init__(self):
        super().__init__()
        self.initUI()

    def initUI(self):
        self.text = "Лев Николаевич Толстой\nАнна Каренина"
        self.setGeometry(300, 300, 350, 300)
        self.setWindowTitle('Drawing text')
        self.show()

    def paintEvent(self, event):
        qp = QPainter()
        qp.begin(self)
        self.drawText(event, qp)
        qp.end()

    def drawText(self, event, qp):
        qp.setPen(QColor(168, 34, 3))
        qp.setFont(QFont('Decorative', 10))
        qp.drawText(event.rect(), Qt.AlignmentFlag.AlignCenter, self.text)

def main():
    app = QApplication(sys.argv)
    ex = Example()
    sys.exit(app.exec())

if __name__ == '__main__':
    main()main()
本例中,绘制了一些西里尔字母,并水平和垂直对齐了文本。
def paintEvent(self, event):
...
使用 paintEvent 完成绘画。
qp = QPainter()
qp.begin(self)
self.drawText(event, qp)
qp.end()
QPainter 类负责所有的底层绘制。所有的绘制都在开始和结束方法之间。实际的绘制被委托给 drawText 方法。
qp.setPen(QColor(168, 34, 3))
qp.setFont(QFont('Decorative', 10))
这里定义了绘制文本的笔触和字体。
qp.drawText(event.rect(), Qt.AlignmentFlag.AlignCenter, self.text)drawText 方法在窗口上绘制文本。paintEvent 的rect方法返回需要更新的矩形。用 Qt.AlignmentFlag.AlignCenter 在两个维度上对齐文本。

PyQt6 绘制点
点是绘制里最简单的图形对象。
from PyQt6.QtWidgets import QWidget, QApplication
from PyQt6.QtGui import QPainter
from PyQt6.QtCore import Qt
import sys, random
class Example(QWidget):
def __init__(self):
super().__init__()
self.initUI()
def initUI(self):
self.setMinimumSize(50, 50)
self.setGeometry(300, 300, 350, 300)
self.setWindowTitle('Points')
self.show()
def paintEvent(self, e):
qp = QPainter()
qp.begin(self)
self.drawPoints(qp)
qp.end()
def drawPoints(self, qp):
qp.setPen(Qt.GlobalColor.red)
size = self.size()
for i in range(1000):
x = random.randint(1, size.width() - 1)
y = random.randint(1, size.height() - 1)
qp.drawPoint(x, y)
def main():
app = QApplication(sys.argv)
ex = Example()
sys.exit(app.exec())
if __name__ == '__main__':
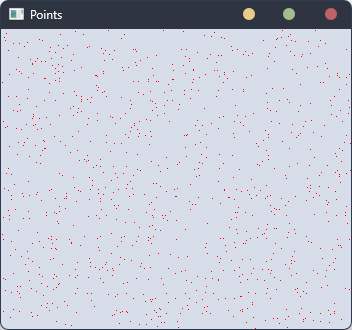
main()上例中,在窗口里绘制了1000个随机的红点。
qp.setPen(Qt.GlobalColor.red)用预定义 Qt.GlobalColor.red 常量常量把笔触设置为红色。
size = self.size()每次改变窗口大小,都会产生一个绘制事件。获得当前窗口大小,根据这个大小把点分布到窗口上的各个位置。
qp.drawPoint(x, y)使用 drawPoint 方法绘制点。
PyQt6 颜色
颜色是表示红色、绿色和蓝色 (RGB) 强度值组合的对象。有效的 RGB 值的范围是0到255。可以用不同的方法定义一种颜色。最常见的是RGB十进制值或十六进制值。还可以使用 RGBA 值,它代表红色、绿色、蓝色和 Alpha 通道,添加了透明度信息。Alpha 值为255定义完全不透明,0表示完全透明,也就是颜色不可见。
from PyQt6.QtWidgets import QWidget, QApplication
from PyQt6.QtGui import QPainter, QColor
import sys

class Example(QWidget):
    def __init__(self):
        super().__init__()
        self.initUI()

    def initUI(self):
        self.setGeometry(300, 300, 350, 100)
        self.setWindowTitle('Colours')
        self.show()

    def paintEvent(self, e):
        qp = QPainter()
        qp.begin(self)
        self.drawRectangles(qp)
        qp.end()

    def drawRectangles(self, qp):
        col = QColor(0, 0, 0)
        col.setNamedColor('#d4d4d4')
        qp.setPen(col)
        qp.setBrush(QColor(200, 0, 0))
        qp.drawRect(10, 15, 90, 60)
        qp.setBrush(QColor(255, 80, 0, 160))
        qp.drawRect(130, 15, 90, 60)
        qp.setBrush(QColor(25, 0, 90, 200))
        qp.drawRect(250, 15, 90, 60)

def main():
    app = QApplication(sys.argv)
    ex = Example()
    sys.exit(app.exec())

if __name__ == '__main__':
    main()
上例中,绘制了三个不同颜色的矩形。
color = QColor(0, 0, 0)
color.setNamedColor('#d4d4d4')
使用16进制定义颜色。
qp.setBrush(QColor(200, 0, 0))
qp.drawRect(10, 15, 90, 60)
这里定义一个笔刷并绘制一个矩形。画笔是一种基本的图形对象,用于绘制形状的背景。drawRect 方法接受四个参数,前两个是轴上的x和y值,第三和第四个参数是矩形的宽度和高度,使用选择的笔触和笔刷绘制矩形。

PyQt6 QPen
QPen 是一个基本图形对象,可以绘制线条,曲线和矩形,椭圆,多边形等形状的轮廓。
from PyQt6.QtWidgets import QWidget, QApplication
from PyQt6.QtGui import QPainter, QPen
from PyQt6.QtCore import Qt
import sys

class Example(QWidget):
    def __init__(self):
        super().__init__()
        self.initUI()

    def initUI(self):
        self.setGeometry(300, 300, 280, 270)
        self.setWindowTitle('Pen styles')
        self.show()

    def paintEvent(self, e):
        qp = QPainter()
        qp.begin(self)
        self.drawLines(qp)
        qp.end()

    def drawLines(self, qp):
        pen = QPen(Qt.GlobalColor.black, 2, Qt.PenStyle.SolidLine)
        qp.setPen(pen)
        qp.drawLine(20, 40, 250, 40)
        pen.setStyle(Qt.PenStyle.DashLine)
        qp.setPen(pen)
        qp.drawLine(20, 80, 250, 80)
        pen.setStyle(Qt.PenStyle.DashDotLine)
        qp.setPen(pen)
        qp.drawLine(20, 120, 250, 120)
        pen.setStyle(Qt.PenStyle.DotLine)
        qp.setPen(pen)
        qp.drawLine(20, 160, 250, 160)
        pen.setStyle(Qt.PenStyle.DashDotDotLine)
        qp.setPen(pen)
        qp.drawLine(20, 200, 250, 200)
        pen.setStyle(Qt.PenStyle.CustomDashLine)
        pen.setDashPattern([1, 4, 5, 4])
        qp.setPen(pen)
        qp.drawLine(20, 240, 250, 240)

def main():
    app = QApplication(sys.argv)
    ex = Example()
    sys.exit(app.exec())

if __name__ == '__main__':
    main()
示例中,我们画了6条线。线条是用六种不同的笔触风格样式的。有五种预定义的笔触。我们也可以创建自定义笔触样式。最后一条线是使用自定义笔触风格样式的。
pen = QPen(Qt.GlobalColor.black, 2, Qt.PenStyle.SolidLine)这里创建了一个 QPen 对象,颜色是黑色,宽度2像素,这样就能区别不同的笔触。Qt.SolidLine 是一个预定义的笔触。
pen.setStyle(Qt.PenStyle.CustomDashLine)
pen.setDashPattern([1, 4, 5, 4])
qp.setPen(pen)
这里我们自定义了一个笔触。样式设置为 Qt.PenStyle。CustomDashLine,用 setDashPattern 方法设置具体样式,参数一定是偶数个,奇数定义破折号,偶数定义空格。数字越大,空格或破折号就越大。这里设置的是1px横线,4px空格,5px横线,4px空格等等。

PyQt6 QBrush
QBrush 是一个基本图形对象。它用于绘制矩形、椭圆等形状的背景。笔刷有三种类型:预定义的笔刷、渐变或纹理模式。
from PyQt6.QtWidgets import QWidget, QApplication
from PyQt6.QtGui import QPainter, QBrush
from PyQt6.QtCore import Qt
import sys
class Example(QWidget):
def __init__(self):
super().__init__()
self.initUI()
def initUI(self):
self.setGeometry(300, 300, 355, 280)
self.setWindowTitle('Brushes')
self.show()
def paintEvent(self, e):
qp = QPainter()
qp.begin(self)
self.drawBrushes(qp)
qp.end()
def drawBrushes(self, qp):
brush = QBrush(Qt.BrushStyle.SolidPattern)
qp.setBrush(brush)
qp.drawRect(10, 15, 90, 60)
brush.setStyle(Qt.BrushStyle.Dense1Pattern)
qp.setBrush(brush)
qp.drawRect(130, 15, 90, 60)
brush.setStyle(Qt.BrushStyle.Dense2Pattern)
qp.setBrush(brush)
qp.drawRect(250, 15, 90, 60)
brush.setStyle(Qt.BrushStyle.DiagCrossPattern)
qp.setBrush(brush)
qp.drawRect(10, 105, 90, 60)
brush.setStyle(Qt.BrushStyle.Dense5Pattern)
qp.setBrush(brush)
qp.drawRect(130, 105, 90, 60)
brush.setStyle(Qt.BrushStyle.Dense6Pattern)
qp.setBrush(brush)
qp.drawRect(250, 105, 90, 60)
brush.setStyle(Qt.BrushStyle.HorPattern)
qp.setBrush(brush)
qp.drawRect(10, 195, 90, 60)
brush.setStyle(Qt.BrushStyle.VerPattern)
qp.setBrush(brush)
qp.drawRect(130, 195, 90, 60)
brush.setStyle(Qt.BrushStyle.BDiagPattern)
qp.setBrush(brush)
qp.drawRect(250, 195, 90, 60)
def main():
app = QApplication(sys.argv)
ex = Example()
sys.exit(app.exec())
if __name__ == '__main__':
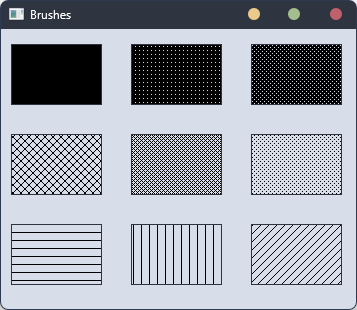
main()示例中绘制了9个不同的矩形。
brush = QBrush(Qt.BrushStyle.SolidPattern)
qp.setBrush(brush)
qp.drawRect(10, 15, 90, 60)
123
这里定义了一个笔刷对象,调用 drawRect 方法绘制矩形。
贝塞尔曲线
贝塞尔曲线是三次方曲线。PyQt6 中的贝塞尔曲线可以用 QPainterPath 创建。画线路径是由许多图形构建块(如矩形、椭圆、直线和曲线)组成的对象。
import sys
from PyQt6.QtGui import QPainter, QPainterPath
from PyQt6.QtWidgets import QWidget, QApplication
class Example(QWidget):
def __init__(self):
super().__init__()
self.initUI()
def initUI(self):
self.setGeometry(300, 300, 380, 250)
self.setWindowTitle('Bézier curve')
self.show()
def paintEvent(self, e):
qp = QPainter()
qp.begin(self)
qp.setRenderHint(QPainter.RenderHint.Antialiasing)
self.drawBezierCurve(qp)
qp.end()
def drawBezierCurve(self, qp):
path = QPainterPath()
path.moveTo(30, 30)
path.cubicTo(30, 30, 200, 350, 350, 30)
qp.drawPath(path)
def main():
app = QApplication(sys.argv)
ex = Example()
sys.exit(app.exec())
if __name__ == '__main__':
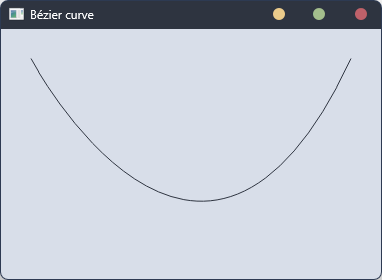
main()This example draws a Bézier curve.
path = QPainterPath()
path.moveTo(30, 30)
path.cubicTo(30, 30, 200, 350, 350, 30)
使用 QPainterPath 创建贝塞尔曲线路径。使用 cubicTo 方法绘制曲线,该方法需要三个点:起始点,控制点,结束点。
qp.drawPath(path)使用 drawPath 方法绘制最终的路径。
本章讲解了基本的绘画。